I always used to download and update my programs the hard way. I would wait until the programs complain that an update is available. From there I would download the update and patch the program. I sure many of you do the same thing. It’s quite time consuming, until I discovered Ninite.
Ninite is a service that supports the installation and update of multiple programs simultaneously. The Ninite service supports a number of popular programs including iTunes, Skype, and Steam. The way Ninite works is you visit the Ninite website and select the program(s) that you wish to update or install then click the “get installer” button and your computer will download a program that will install and update the programs you selected in the background without any configuration required. Ninite will install the programs in their default locations and with the default settings.
Ninite is very easy to use, I’ll demonstrate it below:
Open your favorite web browser and head to http://www.ninite.comAs you can see on the bottom of the Ninite website are the programs that the Ninite installer supports.Click the boxes next to the programs you wish to have Ninite install and update. Then click get installer.Next you will see this screen. It shows what programs you want downloaded , a confirmation page of sorts. Click download installer to download the Ninite program. You can either choose to run the program or save the program to your computer. I recommend saving the program because then you can run it at any time to update to programs you selected. Ninite will usually download the program to the default location (which is the user downloads folder) unless you specify somewhere else.
Locate the Ninite program icon and double click it to run it. After that Ninite will take care of the rest.
Ninite is a fantastic tool that will save time when updating and installing programs on computers. For my next post I’m going to start diving into my specialty: digital forensics. This post will explain what digital forensics is and why it is important today. Thanks again for reading and if you have any questions or concerns please comment below.
A little while back I was using a simple way to backup my computer’s data. I used to drag and drop the folders between my original hard drive and the backup. Eventually when I had a great deal of data on my computer it became difficult to keep track of what was backed up and what wasn’t. I could have just continued to drag and drop my folders and files onto the backup drive but I did not want to deal with all of the duplicate warnings that came along when I backed up my data. Strangely enough I never used the Windows built in backup program, before I had a chance to do so I was shown an interesting backup utility called free file sync.
So what is free file sync? Free file sync is a program that synchronizes one hard drive’s data contents to another. It is perfect for backing up data. Free file sync is what is called open source software. Open source software is programs that have their source code (the actual programming code) openly available for the public to view and edit. What is great about open source software is that it is usually developed by a public community of developers, so updates happen very often. This is the case with free file sync as well so updates happen quite often.
Free file sync’s GUI shows the two hard drives in two separate tables. On the left is the primary hard drive and on the right is the backup or secondary hard drive.
Free file sync’s GUI interface
Free file sync has some great features:
Multiple drives can be backed up at the same time
Compares contents of one drive against the contents of another
Multiple ways to backup data
Two-way
Two-way updating is where changes to one hard drive will be reflected on the other when the back up in done. This occurs both ways. For example say I have two hard drives: A and B. I want to backup the contents of drive A to drive B. Free file sync will compare A to B and see what is different and write changes to B depending on those differences. If I create a text file on A then backup to B the same text file will be written to B. But with two-way if I change a file on B then the changes will be written to A when the backup is done. In my opinion this isn’t a good approach if the two drives are a primary and a backup. The only time I would write from the backup to the primary is if I was restoring the contents of the primary drive using the backup.
Mirroring
Mirroring is where the backup drive is changed to match the primary drive. This is the type of backup method I use and recommend. If I make changes to the primary drive, say deleting a few files and adding some others those changes will be written to the backup when I use free file sync.
Update
Updating is where new and updated files are copied to the backup drive. Any files that are deleted from the primary drive that were previously backed up will still remain on the backup drive.
Custom
The custom setting is where the user can configure the way free file sync will back up hard drive contents. There are five options that can be turned on or off to create the custom setting:
Copy new items to the right
Overwrite right items
Leave as unresolved conflict
Overwrite left item
Copy new items to the left
Cross platform support
Free file sync can be used on Windows, Mac OS-X, and Linux
For Mac users I recommend using the built in time machine for backing up data and settings.
You can take the contents of an entire hard drive and just place them into a folder on the backup drive. It’s all up to user preference.
Free file sync is easy to use. I will demonstrate its use in the tutorial below.
The highlighted section is where the primary hard drive’s contents will be
In the highlighted section click the browse button and select the folder(s) and/or file(s) to back up to the back up hard drive
This is where the backup drive’s contents will be. Click on the browse button and select the location where you want your back up files to go.Click on the comparision button and free file sync will compare the two locations to each other. By default whatever is not on the left side (primary hard drive) will be placed into the right side (backup hard drive).If you are satisfied with where the files are going to be placed click on the synchronize button. Make sure to have the backup settings you want. Click on the gear icon next to the sync now button to change the back up settings. After that click on the start button to begin the syncing of the two drives.After the syncing is complete free file sync will report how much data was transferred and how long the back up took.
Free file sync is an easy tool to use for backing up a single folder or an entire hard drive’s contents. For the next post I’ll be showing another tool I use that allows me to install and update multiple programs on my computer at the same time. As always if there are any questions or concerns please email me at hackingdefense@icloud.com or leave a comment below.
I remember when I got my first computer back around 2000. It was a great machine when it first came out. It operated quickly, my programs ran quick, and it didn’t act up too much. All of that changed after about three months of using it. It started getting sluggish, programs would not run properly, and it would lock up quite a bit. I didn’t know what to do at the time. Afterwards I just bought a new computer. A few months after that I learned what was causing the original computer to act up. It was due to a lack of maintenance. I didn’t have any AV (anti-virus) or anti-malware programs on it. I also did not regularly run two built in Windows tools: chkdsk (check disk) and defrag. If I had used this set of tools then I may have been able to keep the older computer healthy. This post is about how to keep your computer virus and malware free. Also this post will show you what built in Windows tools will help with file system maintenance.
First let’s start with anti-virus programs. What exactly is an anti-virus program? These types of programs fall under an umbrella of programs called HIDS (Host based intrusion detection). Some may disagree with this assumption but I believe that AV does fall under this category since these types of programs monitor the internals of the computer system for unwanted software. Examples of AV programs are:
Microsoft Security Essentials
Norton Anti-Virus
McAfee Anti-Virus
How do these programs work? After installation of the program it usually updates with files called signatures. These signatures are used by the program to pick up unwanted software that is on the computer. When the AV program scans the computer it will look for programs that match the signatures that the AV program has in its database. If there are any matches then the program will flag them and inform the user about what it has found. After that the program prompts the user about the unwanted software it found and gives the user options on what to do with the unwanted programs. Most AV programs have the same set of features: virus detection, real time protection, signature downloads, etc.
In my opinion there is nothing but pros when it comes to having AV software. No computer in use today should be without some form of AV software.
Here are some of the pros:
Instant detection of viruses
Deletion of viruses
Quarantine of viruses
There are no cons to having an anti- virus program installed on your computer. Today with hacking being so widespread anti-virus is critical to the safety and security of computers.
I use Microsoft Security essentials. It’s a free anti-virus solution that is available from Microsoft.
Another type of program that is extremely useful for computer security is anti-malware. These programs do essentially what anti-virus does. These programs are built to target malware. Make no mistake a virus is not a piece of malware. They are two different malicious programs. In my experience it’s best to have both an anti-virus and an anti-malware program installed on a computer at all times. Some examples of anti-malware programs are:
Features, pros, and cons for the anti-malware are pretty much the same as the features for the anti-virus software packages. These days never have a computer that does not have some form of anti-malware installed on it.
The next couple of tools that are useful are two built in windows utilities that assist with maintaining the file system and hard drive(s) of the computer. The first is chkdsk (check disk) and the second is disk defragment.
The first tool: chkdsk (pronounced check disk) is a Windows built in tool that checks the hard drive for errors in the file system. These errors can prevent the computer from functioning if they are not repaired. This tool will help in fixing these errors. This tool can be used in both the Windows GUI (graphical user interface) and the command line.
Click the start bar then computer. After that right click the C drive and click on properties.Under error checking click on check nowThis screen will allow you to check the C drive for errors. I normally click on the checkbox for scanning the disk drive for bad sectors. Under normal circumstances Windows will not allow this scanning to take place. This is because the drive is currently “mounted” and in use. If Windows allows the checking to take place it usually take quite a while. Using the command line is a much faster method for checking the disk drive for errors.
This is the second method for checking the disk drive, using the command line.
Click the start bar then enter “cmd” into the search bar. After that right click on the cmd icon then click run as administrator. You may have to enter an administrator password in order to open the command prompt window.After the admin command prompt comes up type “chkdsk” into the command line. Since there is no drive letter specified after the command Windows will check the boot drive (C:) by default.After hitting enter for the check disk command Windows will go through checking the disk for errors. In the output notice that the program says that the F parameter was not specified. This means that Windows is only going to check for errors and not fix them. In order for Windows to perform a complete check the C drive must be “unmounted”. This is done by typing “chkdsk /F” at the command prompt. Windows will then ask you if it can perform a disk check on the next reboot of the system. enter y then hit enter. The next time you reboot the computer Windows will run check disk while the system is booting and also fix the error if any are found.This is what is displayed when the /F parameter is used on the C drive. Enter y and the next time the computer boots the drive will be completely checked and any errors will be fixed.
The second tool: disk defragment is a tool that is used to organize the contents of a hard drive. As the hard drive is used the contents of the drive become fragmented. As fragmentation occurs the performance of the computer slows down. This tool helps to mitigate that problem. This tool can also be used in the GUI and the command line. I will demonstrate both methods in the tutorial below.
Click the start bar then computer. Then right click the C drive and left click properties.Under disk defragment click defragment nowThis is the disk defragmanet screen. Click on the C drive then click analyze. Always have Windows analyze the disk first, When this is done Windows checks to see how much of the C drive is fragmented. Based on this percentage Windows will tell you either to defragment the disk or to leave it alone. If the drive needs to be defragmented then click defragment disk after the analysis is complete. This method is much slower then the command line method. Also Windows might complain that the disk drive is in use so it will not be able to defragment it.
Here’s the command line method of using defragment.
Using an administrator command line prompt (see above on how to open an administrator command line prompt) type in ” defrag c: /a”. “defrag” invokes the defrag program, “c:” is the letter of the drive you want to defragment, and “/a” is the parameter that tells defragment program to analyze the drive. To defrag the drive without analyzing just type in “defrag c:”This is what is displayed in the command prompt when defrag is invoked without any parameters.
One of the most important things you can do with your computer is to keep Windows patched. What exactly is a patch? A patch is a piece of code that fixes a flaw in a program. When Microsoft finds a flaw in Windows they create a patch to fix the problem. Sometimes you will see a window pop up that says updates are ready to be installed on the computer. These are the patches that Microsoft comes out with to fix problems. These patches are usually released on the second Tuesday of every month. This Tuesday is called patch Tuesday. Always keep your computer patched with updates. There is a GUI window that will allow you to check for updates anytime you want. I’ll show this in the tutorial below.
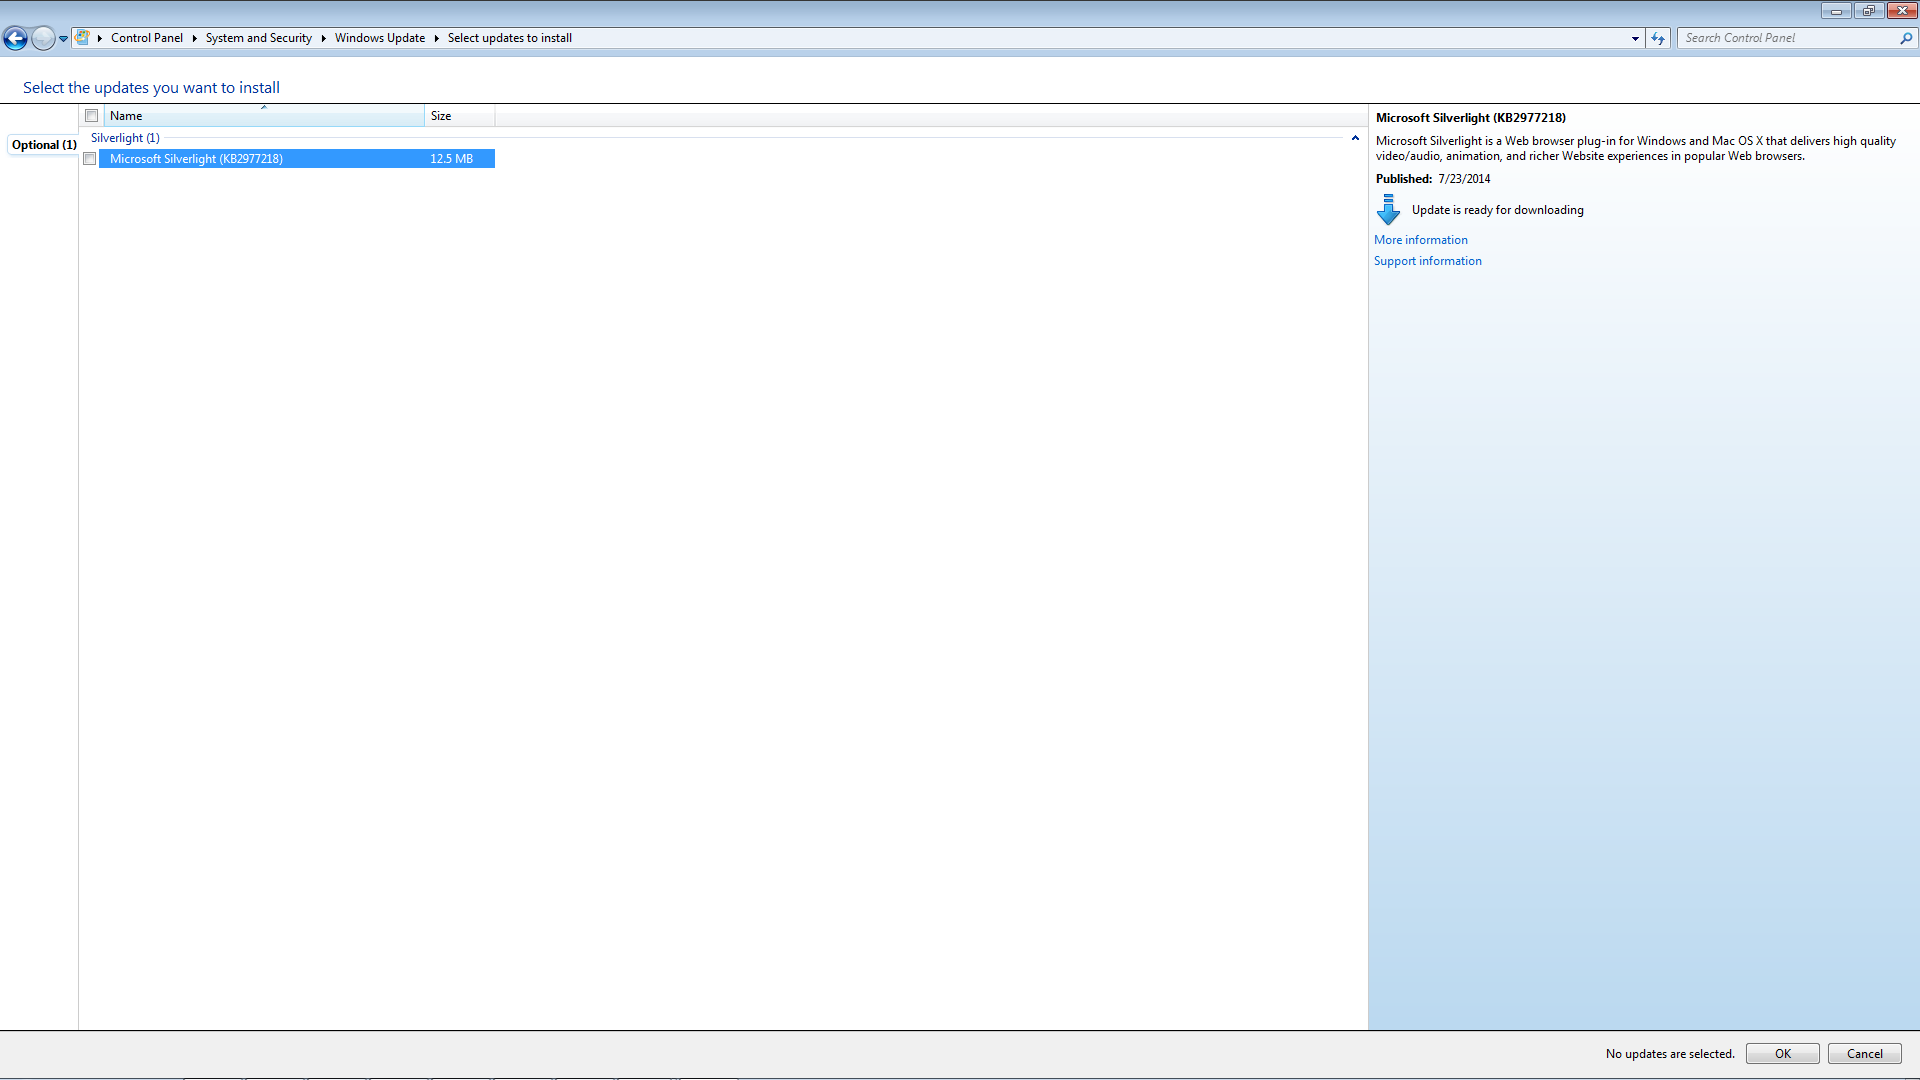
Click the start bar then enter “windows update” into the search bar and hit enter.This is the Windows update screen. On the left click “check for updates”. Windows will then check for updates.After Windows completes checking for updates it will tell you what updates are available to download and install. These updates will be split into two categories: important and optional. Always download all of the important updates.After clicking on “1 optional update is available” this screen pops up. This tells you the details of what optional updates are available to download and install. You will see a check box to the left of name. When selecting which updates to download and install this will select all updates. Do this when installing important updates.
The settings for Windows update can also be set to download important updates automatically.
On the left side of the Windows update screen click on “change settings”This is the screen that will changes the settings for Windows update. Install updates automatically is usually selected by default and is also the setting I recommend.
The last thing is probably the most important task of all: backup your data. I remember on one of my older computers I lost all of my data because I didn’t back it up. Do not make this mistake. With all of the information that is on the average computer these days it is a real pain to have to start from scratch if data is lost.
I run my anti-virus, anti-malware, patch updates, and my data backup once a week. This has been good practice for me and I’m sure it will work well for you.
There is a real neat tool that helps with backups called free file sync. I use this tool to back up my data. I’ll cover this tool in the first post of a new blog post series called Rob’s tool box. Thanks for reading this post and if there are any questions or comments feel free to comment below.
Have you ever had the experience of forgetting a password? Most people now have their passwords recorded somewhere. I remember I had a piece of printer paper that had all of my usernames and passwords on it. There were about 30-40 different combinations of usernames and passwords. That’s quite a bit of passwords to remember. I was creating new accounts and services to use over the course of a few years and I have been putting the login information on this single piece of paper. Then I lost the paper, I was at a standstill. I scrambled until I found the piece of paper. Then I breathed a sigh of relief. After that experience I decided to go with electronic password storage. I started with a program called Keepass then from there I went to Lastpass. Electronic storage is much easier for me to handle. I don’t have to worry about remembering or having a piece of paper with all of my passwords recorded on it. I’ll go into more detail about Keepass and Lastpass later but first, what is a password?
A good definition of a password is a combination or letters, numbers, and special characters (such as @,#,$ and *) that when passed to an OS, application or web service allow the authorized user access to their account. Passwords can also be combined into passphrases. These can be quotes from TV shows or sayings that the user prefers. I recommend this approach because they are easy for the user to remember and they are usually long. When setting a password for an online service, application, or account make sure to check the password requirements. Sometimes they are very lax max length of the password might be only 10-12 characters. I have seen this in several places and personally I don’t like it. I usually like my password length to be somewhere between 15-20 characters. Longer if necessary depending on the account it is protecting.
How do passwords work? I’ll use Windows passwords as an example. When you create an account you fill out your username and password information, but what does Windows do with this password information? When the account is registered Windows takes the password and hands it over to a cryptographic algorithm. (Cryptographic algorithms are a set of rules that are used to scramble a human readable word.) After the password is scrambled it is called either a cryptographic representation or a hash. After the hashing process the password hash cannot be reversed or changed back. This is why the cracking of passwords is necessary by attackers. This hash is stored by Windows and used as a comparative value when trying to log into the account the password is protecting. When you try to log into your user account Windows will take your password that you typed at the log in screen, hash it, then compare it to the original hash that was created during the registration process. If the hashes match then you are granted access, if not then you are denied access.
In the red box are the account hashes from a Windows 7 machine. You will see names like account1 then a random set of characters. account1 is the name of one of the registered accounts on the machine and the random set of characters is the password hash. The format for the output is – account name:SID (security identifier):password hash Note: This picture is from the output of a hacking tool I used against my own VM (Virtual Machine)
Windows comes with a nice built in password security feature that is helpful: the password policy. This is used to control how the passwords for all of the accounts on the system are created. The administrator can set a level of complexity, length, and password age. This feature can be enabled through the local security policy dialog box on Windows 7 professional and ultimate and Windows 8 professional and ultimate. For other versions of Windows 7 and 8 the command prompt must be used in order to change the password policy.
In my experience I have found some practices with passwords are good and others not so much. I’ll walk through the rules I use when creating and dealing with passwords.
First and foremost NEVER EVER use the same password for multiple accounts and services. Because if that password is cracked then the attacker will have access to all accounts that use that password. Using the same password is never a good idea.
With passwords most users would think that having special characters is the most important factor; it’s not. The most important factor with password creation is length. Brute force password attacks can crack any password no matter how complex. It’s just a matter of time. This is why length is so important. The longer the password the longer it takes for it to be cracked. Some passwords can take years or decades to crack based on how long it is. Make sure your passwords are a good length. In my experience a good password length is 15 characters. Do not have passwords that are less than seven characters. These are fairly easy the guess and crack. Special characters are a plus but the most important thing is to make sure the passwords you use are of a good length. Do not base your passwords on your name, email address, or date of birth. Doing so would make the passwords easier for the attacker to guess.
I have used two different programs to store my passwords after I stopped recording all of them on a sheet of paper.
Keepass stores the passwords that are placed in the program in a separate file. This file is opened using a master key. I like to think of this file as the password vault. When the file is closed the file is encrypted by the Keepass program. Some additional features are: password creation, grouping of passwords, adding notes to password entries and much more.
Overall Keepass is a great program for anyone that is looking to store their passwords on their computer or mobile device.
Another great program for storing passwords is called Lastpass. This program differs from Keepass in which the passwords are not stored in a file on your computer but on an online server. Lastpass has many features: website password and username auto filling, secure password generation, and saving passwords as you create new accounts on websites.
There are three different versions of Lastpass:
Lastpass pocket
Standalone program that can be installed on a USB drive making your password vault portable
In order to use the mobile version of Lastpass you have to be a premium subscriber. It’s only $12 per year. That’s a $1 per month, more than worth it in my opinion.
In my experience Lastpass has many pros.
Password generation
Note taking for each password entry
Password auto filling
Password entry sorting
Security checking for passwords
In my opinion there is one con with lastpass
You have to remember the security key to open the lastpass password vault. If this key is lost or forgotten then the vault cannot be opened.
Using these programs and steps has made passwords easy for me to use and manage. I hope these tips and tricks also make it easy for you as well. If there are any questions or concerns please feel free to drop a comment on the post or email me at: hackingdefense@icloud.com
JP Morgan admitted that it was a victim to a cyber-attack. 76 million US households and 7 million businesses were affected by the breach. The data that was compromised included names, emails, and other contact information. According to the bank their customer’s money is “safe”.